This page serve's as a text guide for using any of the zombies for the Apocalyptic Collection with your own character controllers.
Goals
Following this guide, you will be able to implement the outfit/material randomization and morph control animations to a custom blueprint
Brief Overview
The zombie randomization relies on the blueprint, BPC_OutfitController which is found:

BPC_MorphControl gives the zombies randomized facial movement based on there blendspaces. This will let them scowl and move there mouth at defined speeds to give them more depth.
Each Zombie, has it's own pre-configured child-class that inherits from BPC_OutfitController and BPC_MorphControl. Generally, I don't advise you modify these unless you are comfortable working with blueprints to atleast an intermediate level.
In each Zombie blueprint folder, there is a components folder which contains a single preset child class for the BPC_MorphControl, and two preset child classes for BPC_OutfitController. One class is setup to use the additional dismembered components in the randomization. (Note: Dismemeberment is not configured out of the box, but the models are provided)
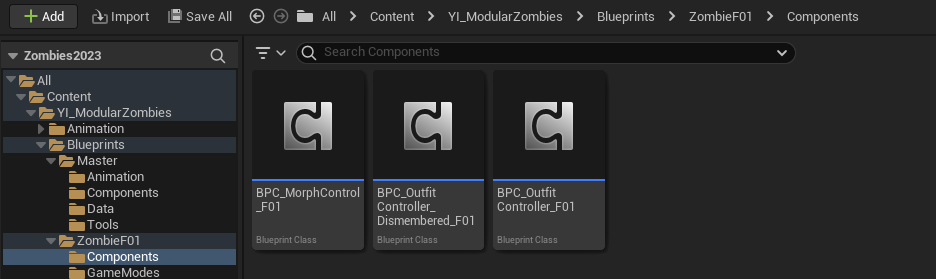
You can open up these components to change the randomization parameters and data. You don't need to make any changes here, but if you like, you can modify the Mesh Data and Materials structures to add or remove variations you don't like. You can also choose whether to manually define the seed for the zombie, or for it to randomize on begin play.


Integration
Step 1
To use these asset's with a custom controller, open up BP_AI, and the character controller blueprint you wish to use (SmartAI, Thirdperson etc.)

Inside BP_AI, select all of the nodes, copy, and paste them into your custom controller. Select "Do Nothing" and press "Confirm" when the warning message appears.
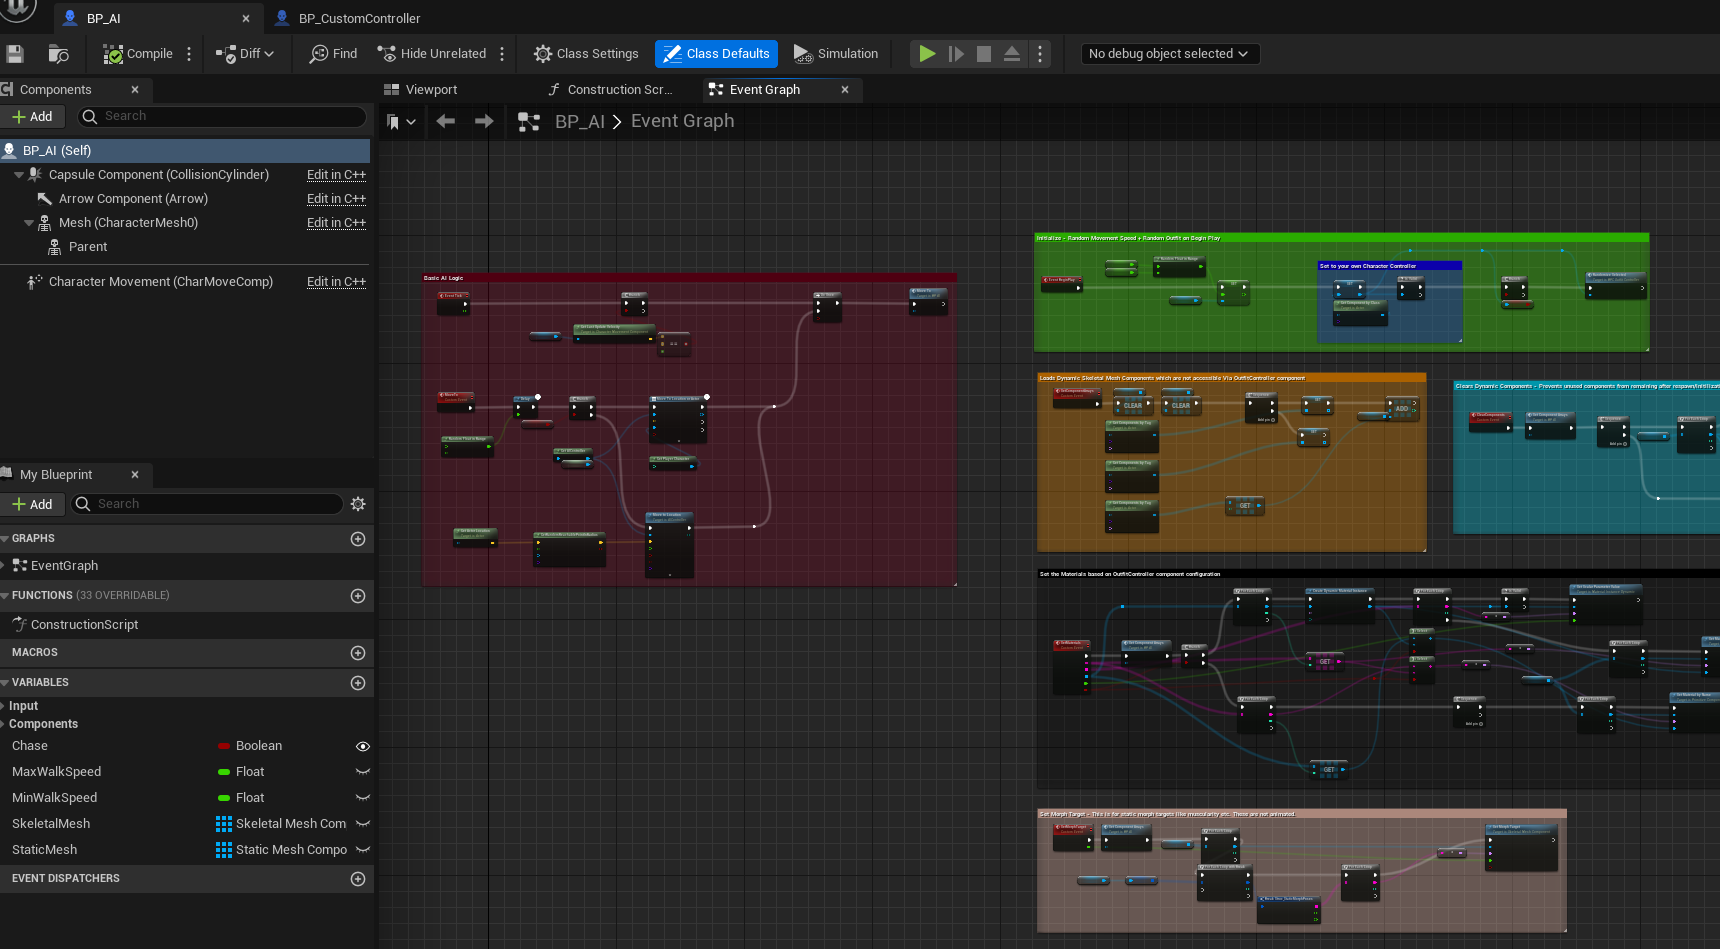

If your custom controller already has a Begin Play event, you will need to extend it with this code.


Next, click Compile. This will mark all of the changes we need to correct.
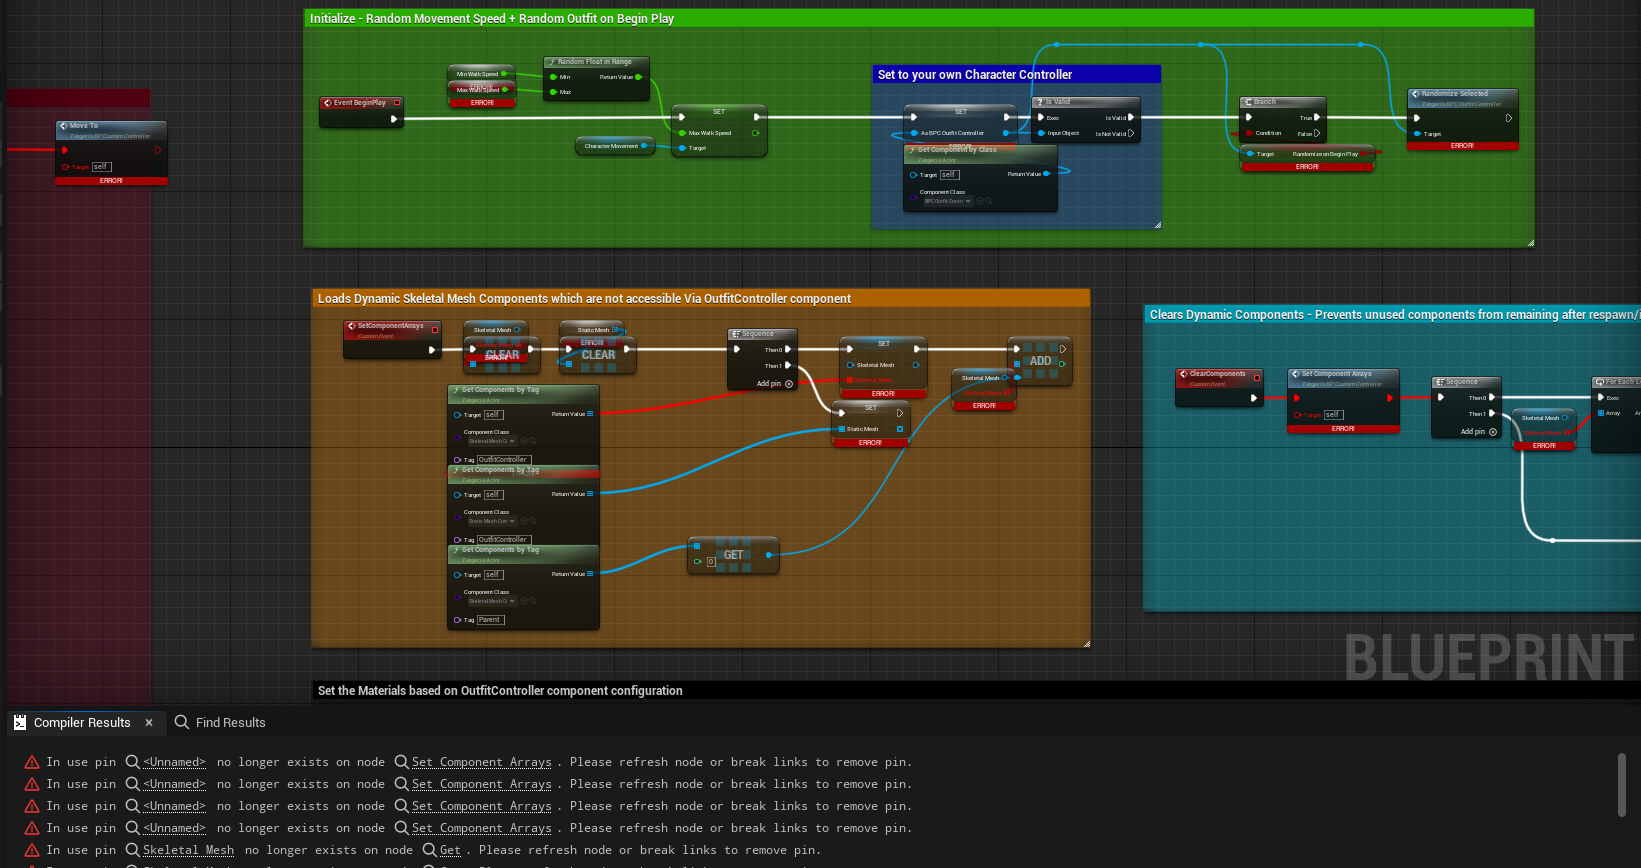
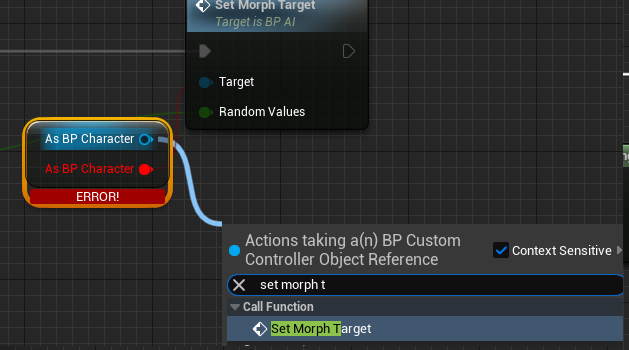
Right click any of the missing variables, and click "Create Variable". These variables can be checked in BP_AI for any default values you should update.

Do this for each comment box. For Array's, if you cannot promote directly, select the variable, and in the details panel, change the Variable Type to an array.


For events, like "SetComponetArrays", drag off the connecting node, and simply call the event again, this will update the references and fix the compiler error.


Your final variable list should look like this.

For the final step, and this will depend on whether you want to use UE5 IK Retargeting, or a simple UE4 skeleton setup. In this example, we are working with the UE5 ThirdPerson template.
Add a skeletal mesh component, and parent it to "Mesh". Select the new component, and in the details tab, look for "Tags". Add a new tag, and call it "Parent". This step is important.


If you are doing UE5 mannequin retargeting, select the original skeletal mesh component. In the details panel, open the Advanced accordian and change enum Visibility Based Anim Tick Option to "Always Tick Pose and Refresh Bones". This step is important to calculate the animation on the hidden skeletal mesh. Without it, the animation will simply not play, and your zombie will retarget to an empty animation.

Step 2
Open the parent class for BPC_OutfitController.

Change this variable type, to reference the new character class you plan to use.
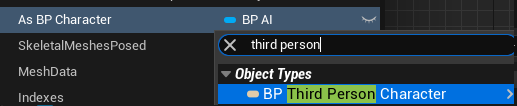
Click "Change Variable Type" when the warning message appears.

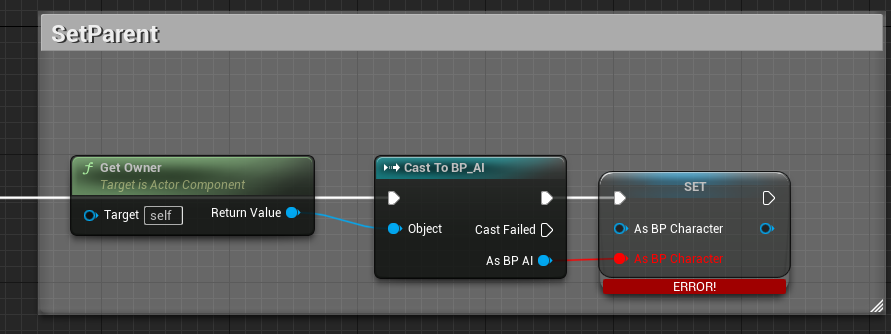
Press "Compile", and you will receive a set of reference errors. Click on each reference, and update the nodes/variables/functions to your new custom controller reference.


In the parent comment box, you will need to change the cast from BP_AI, to instead cast to your custom controller.
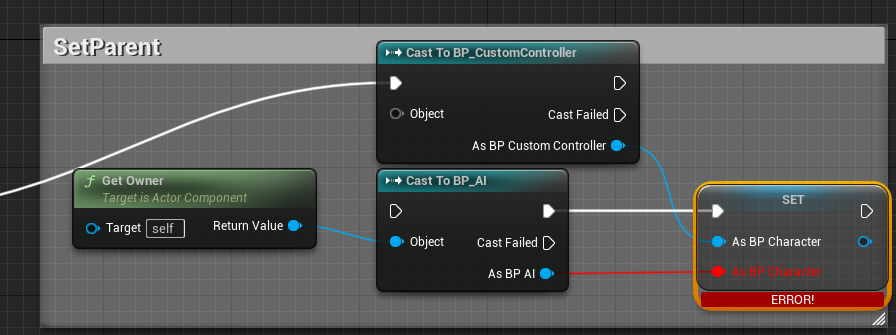

Once these reference errors are corrected, press compile, and you should no longer have any errors.

Step 3
Right click your custom controller, and click "Create Child Blueprint Class".

Open the new child blueprint you have created.

Open the content drawer, and drag one of the preconfigured BPC_OutfitController and BPC_MorphControl components into the components section of your blueprint and press "Compile".


You can now spawn these characters, or add them to your level manually.
Step 4
If you add a zombie to your level manually, you can select the actor, and inside the details panel, you can access the OutfitController component.

There are three exposed event's you can click "Clear Mesh", "Randomize All" and "Randomize Selected". Pressing these will randomize or clear the zombie which can be useful for debugging or previewing specific seeds.
Congratulations, you've now integrated the zombie with your custom controller!